Getting thing back on track!

May 30, 2012

Hi guys! I thought I might check in as I haven’t for a while. So sorry for that! Be assured I have many posts in the making I just have to find some spare time to sit down and write them up. Spare time is something im finding hard to locate lately.  The pressures of running a blog and working full-time has finally gotten to me.  I expect I will be studying again in the second half of the year and I have just excepted a promotion at my current workplace!

For these reasons I can’t promise my old schedule of one post per week but I will still aspire to this. Maybe one day I’ll get that work / life / blog balance right. Heck I’m still young so I have plenty of time to get that sorted!

Until my next project post, farewell and take care xx

Jimmy Choo Inspired Clutch

March 18, 2012

I spotted this Jimmy Choo clutch in Australia’s Harper’s Bazaar’s April 2012 issue. It retails for AUD$2525! Ouch!
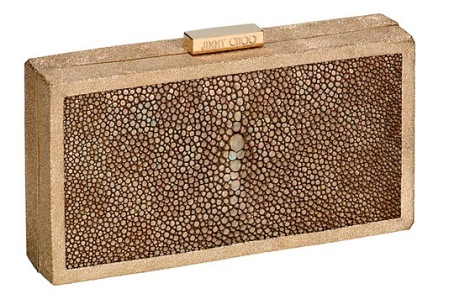
Jimmy Choo is another one of those unattainable brands that make girls like me oh so sad. Ahh to own a Jimmy Choo bag, that would be the life!

But enough with the pining! I will deal with this is issue like I do most; I’ll make my own version!

For this project you will need a wooden craft box, a drawer pull, glitter (I’ve mixed together equal parts of both gold and brass to create a dual tone), a paint brush, super glue, PVA glue and clear acrylic spray paint.
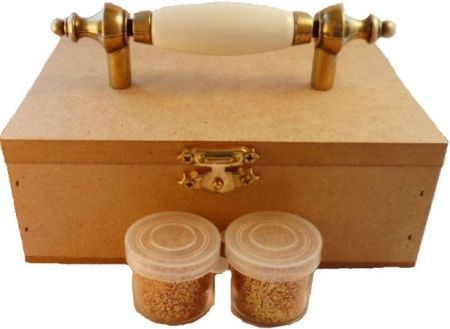
We will start by using super glue to attach the drawer pull / handle onto the box.

Leave the super glue to dry for a good hour, maybe even a couple. We want to make sure its stuck well and good.

Use a paint brush to paint the PVA onto one side at a time.

Place a sheet of paper underneath the box (your glitter supplies will thank you), and pour your glitter in excess over the box and press it into the glue.

Tap of all excess glitter onto the sheet of paper underneath and leave the box to dry. You can the use the paper to funnel the glitter back into its container (see I told you, plus it’s less mess solution).

Glue glitter on each side until the whole box is covered. Be sure to pay particular attention when painting the glue around the hardwear.
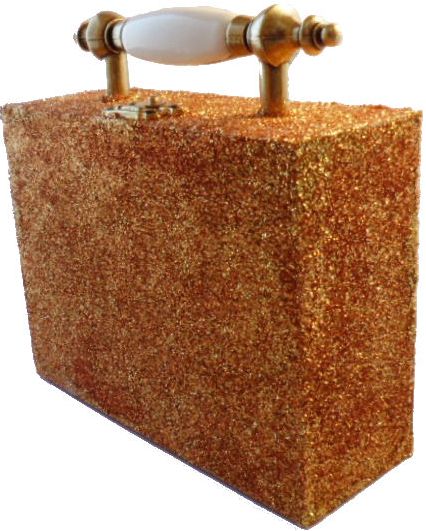
Now all you have to do is give it a few even coats of clear acrylic spray paint and you’re done!
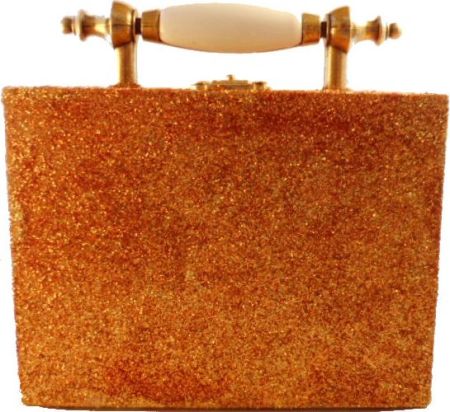
Yay! This one is super quick and so simple but it will add just the right amount of glitz to your favourite outfit! Heck this would even go great with my Louboutin Inspired Pumps!

Louboutin Inspired Pumps

March 17, 2012

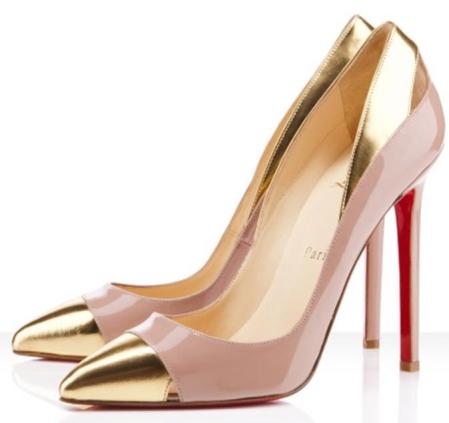
So got these nude pumps on clearance for AUD$10! I’d been looking for shoes exactly like these for ages but to no avail. But why look for them so intensely you ask? So I could make them over with gold leaf of course :P.

My inspiration? These AUD$650+ Louboutin Pumps:

Aren’t they divine?! I thought so too. So I got to work!

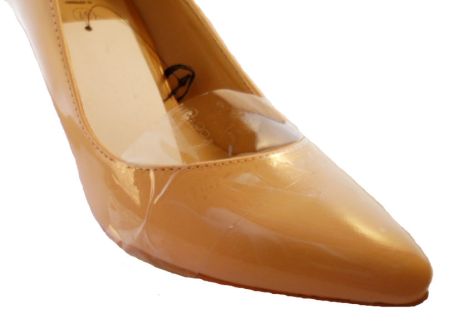
You will need gold leaf, leafing glue, a paint brush, clear acrylic spray paint, some tape and the shoes, of course.

Start by sectioning of the tip of the toe with tape to control the gold leaf. Paint the desired area with the leafing glue and leave for 25 minutes to get tacky.

Carefully place the gold leaf over the area once tacky.

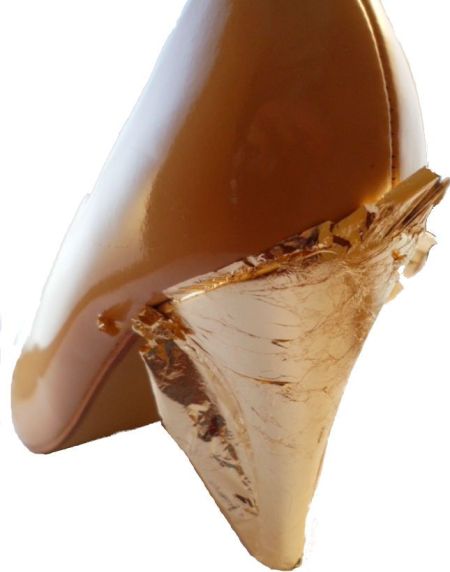
Repeat the same process for the heel.

Leave the shoe for about 25 minutes to ensure the gold leaf sticks to the shoe.

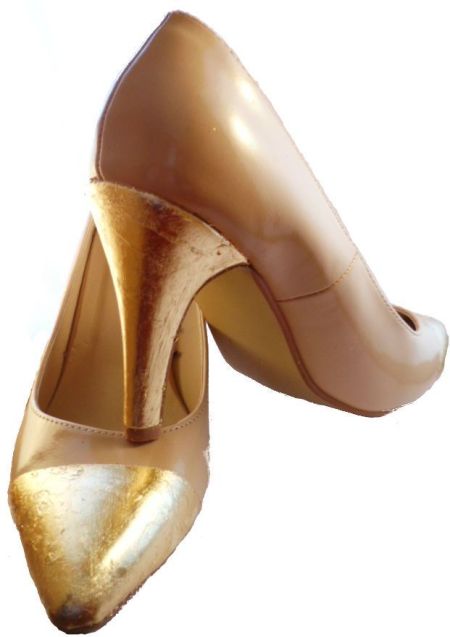
Use a box cutter / Stanley knife to run along the edges of the gold leaf. I then used my nails to remove any excess leaf off the shoe.

Lastly, spray the shoe with clear acrylic spray paint. Viola!

I can’t wait to wear these babies!
MIMCO Inspired Handbag Makeover

March 4, 2012

It’s a little known secret that my favourite brand for handbags and accessories is MIMCO. The bad thing about this obsession is the price tag that is associated. I have previously posted my DIYs of MIMCO inspired Tassel Earrings and the matching Necklace which I often myself making excuses to wear every weekend.

Today I will show you how to add distressed gold onto bags just like this gorgeous Tote from MIMCO which retails for AUD$699:

You will need:

A bag, I chose a satchel bag from Kmart for AUD$19, gold leaf, leafing glue, two paint brushes, tissue paper and clear acrylic spray paint.

First things first. You will need to prepare the surface by wiping it down with a clean damp cloth. This will remove any dust and will ensure the glue adheres to the surface of the bag properly. After doing this use a paint brush to roughly paint on the leafing glue onto the chosen surface:

Let the glue get tacky for 25 minutes, this will make the gold leaf stick to the glue better.

Be careful when handling the gold leaf as it can and will break very easily. If you can eliminate any open windows or doors this will help during handling. I used 4 squares of gold leaf to cover the entire surface of the bag.

The video below shows how to use tissue paper to press the gold leaf into the glue and how to use your fingernail to roughly and randomly distress your leaf.

Next you will need to use the second paint brush to brush off any excess gold leaf and create further distressing.

Lastly use clear acrylic spray paint to create a lasting sheen and to seal surface.

Voila!
My new weekend bag!

Updates…

February 19, 2012

Hi lovelies,

On this more then normal weekend I thought I would share with you developments of late and future.

Firstly, I have changed the layout to enable a custom header to be displayed. I also think the colour and font scheme suites the blog a lot better. And then of course the aformentioned header. It started off with just the text and later added the bird. Which I’m loving! What do you go guys think?

Secondly, I have been (as promised on my About Me page) working toward providing more presentable photos.

To make the photos extra pretty for you guys I have been using pixlr.com to edit my photo closer to pristine condition. Pixlr Is has basic functions close to that of photoshop and it’s free!

Lastly, I will be updating some of my tutorials with step-by-step photos. This include my most popular Harry Potter Wands and Tile Coasters.

Stay tuned for those updated posts!
xx

Handbag Makeover – Sad to Fab

February 12, 2012

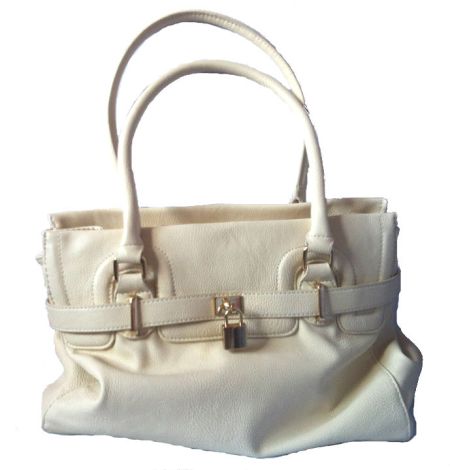
I recently acquired a $30 voucher for a shoe store, but wasn’t in the mood for new shoes (shock horror). I opted for a handbag instead. After the $30 discount I got this handbag for only $9.95! Can you say bargain?

It is an okay handbag but I feel that’s a bit too plain but for $9.95 I couldn’t really complain. I thought this bag would be perfect for a sad to fab makeover.

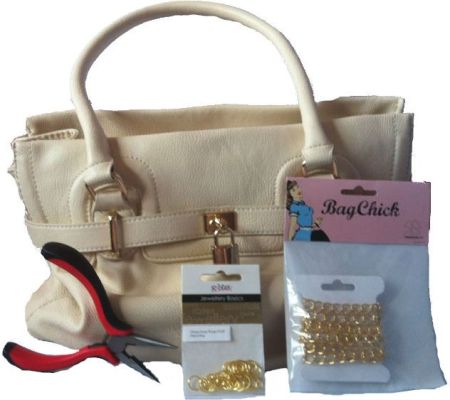
First I started out with some gold bag chain and jump rings.

Using pliers open a jump ring to capture the chain.

To determine the best length of the chain I stuffed the bag with some clothes to hold it upright. Once I determined the length of the chain I used the pliers to unlink and then attach it to the jump ring on the other side.

I then attached the second chain to both jump rings.

And then a third.

I love how a few strands of chain can transform a handbag. I will most likely add some charms but for now this will do.

Braided Headband

February 4, 2012

I’m not a headband kinda girl. Mostly if I’m wearing a headband it would be because I am curling my hair (a post will be made on that at a later date). I must admit though, sometimes a headband could be exactly what I am missing to complete an outfit.

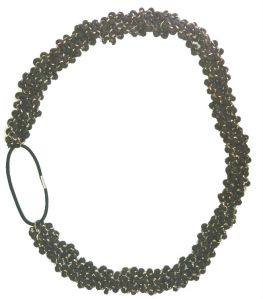
This project began with some round chain and leather cord. I weaved the cord through the chain to create semi-flat surface.

I made three of the weaved combinatations in equal lenth and used a jump ring to join all three ends to begin braiding.

Once completed I used another jump ring to seal off the braid and glued the stray bits of cord down.

It’s almost done! All you need to do now is grab a hair tie and open the jump rings to also hold the hair tie.

Voila!

Have fun xx

Statement Celtic Knot Necklace

January 26, 2012

I’m falling hard for statement necklaces at the moment and I’ve always loved celtic knots! So combining the two kinda made sense. Well not really. But after seeing this video it did:

They make it look so easy and it actually was!

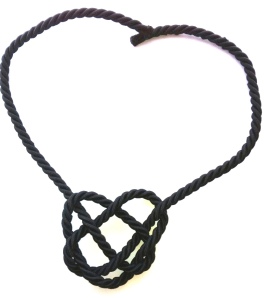
First things first, you need to select your cord / rope and make the heart. I opted for a lose heart shape.

After making the knot all you need to do is burn of the edges to prevent fraying.

You will need to use hot glue to fuse the ends together. To hide the mess you’ve just created use matching ribbon and glue down.

And you’re all done!

My new favourite accessory! After my Mimco Inspired Earrings and Necklace of course!


MIMCO Inspired Tassel Necklace

January 20, 2012

Late last week I posted my tutorial on MIMCO Inspired Tassel Earrings, today I am going to show you how to make a matching necklace!

Here is what you will need:

  • Silver Button
  • Tassel
  • Felt
  • Diamante Silver Chain
  • Silver Chain
  • Jump plate Findings
  • Hot Glue
  • Measuring Tape

And here is how to do it:

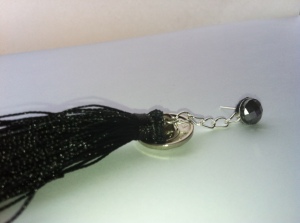
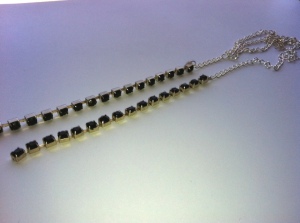
To get your desired length hang the silver chain around your neck (I cut mine about an inch away from my collar bone). With the chain still around your neck hold the diamante chain at both ends of the silver chain, lengthening the diamante until you are happy with the length then cut.  Use jump plates to join the silver chain and the diamante chain together (you can use glue to adhere the jump plate if you have no way to attach it to the diamante chain), and cut the diamante chain exactly in half.

Use hot glue to fix the ends of the diamante to the back of the button. Cut the tassel just above the wrapped area and use hot glue to fix it to the back of the button.

Use the felt to cover the mess on the back on the button by cutting a circle and using hot glue.

Voila!

Matching accessories!

I hope you have as much fun making them as much as I did!

xx

MIMCO Inspired Tassel Earrings

January 14, 2012

I love MIMCO more than anything else and when I saw these Forever Tassel Earrings in their new collection I knew I must have them! But ouch the price tag; $99.95!

Considering gold is not my colour I opted for a silver and black combo!

Here is what you need:

  • Earring stud bases
  • Gems
  • Tassels
  • Buttons
  • Chain
  • Felt
  • Jump plate findings
  • Hot glue

And here is how to do it:

Use hot glue to fixate gem to the stud base. Take the chain and hook its first link on your stud. Cut a felt circle to the same size of the stud base and glue over the chain to keep it in place.

Use a jump plate finding to attach the chain to the button.

Cut your tassel just above the wrapped area. Glue your tassel to the back of the button.

Lastly use your use your felt to cover the mess at the back. and voila!

I’m in love! They will transform any casual outfit into glam!

I hope you have as much fun making these as me xx